
De-Winterizing RV Water System
If the temperatures stay below freezing where you live, you have two options when storing your RV for winter. Either store it in a climate controlled building. Or winterize the water system to prevent damage from freezing water. If you chose to winterize your RV getting it ready to go again in the spring isn’t tough. Although it’s non-toxic you don’t want to drink that pink RV antifreeze. Follow this simple De-Winterize RV Checklist and you will be ready to go in no time.
De-Winterize RV Checklist
If you removed your water heater drain plug for winter. Wrap the threads with Teflon tape and re-install the drain plug.
Connect a drinking water hose to your tank fill and add about ½ a tank of fresh water. While it’s filling open your hot and cold low point drains.
Turn on your RV water pump. Let water drain from the low point drains until the water runs clear. Then close the low point drains. This will flush most of the antifreeze from your system.
Connect the hose to your city water connection.
Now, move to the fixtures. Open each sink, shower and toilet one at a time. Start with the fixture closest to the city water connection. Run the cold and hot separately to make sure both are flushed.
Don’t forget your outdoor shower and outdoor kitchen sink if equipped.
If you have a clothes washer follow the manufactures recommendation for de-winterizing it. This usually involves running an express or quick cycle.
Now you have remove all the antifreeze from the system. Next locate your hot water tank bypass valve and switch it back to normal operation. This could be 1, 2 or 3 valves depending on your manufacturer. These valves are typically located on the back of the hot water tank. Some higher-end models have a valve located in a water panel near the city water connection.

This completes the de-winterizing process. Next you should sanitize your water system before your first trip.
Once you complete the de-winterize RV checklist
While you are getting your RV ready for spring here are a couple other things you should take care of.
Drain Valves

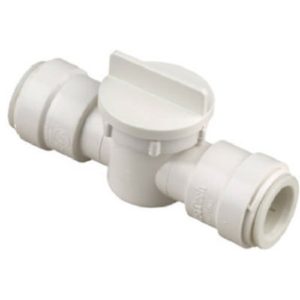
- If your low point drains use removable caps now would be a great time to upgrade them to valves. Having valves will make using the low point drains quicker and easier in the future. Most RV water systems use ½” PEX tubing so adding a valve is a simple a cutting off the old cap and pushing a valve in its place. This plastic valve is light weight, won’t corrode and has push-to-connect fittings built-in.
Replace Water Filter
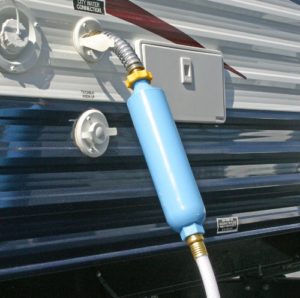
- Get an inline water filter. Even you your RV is equipped with a filter an inline line water filter is a smart addition. You attach the filter between your hose and your city water connection.
- This filters the water before it ever gets into your RV. When the filter gets old or clogged you just throw the whole thing away and get a new one. For the best filtration use a carbon filter model.
RV Tank Treatment
- Now is also a great time to stock up on chemicals to keep your black tank odor free. You don’t want to get out on your first trip of the season without tank treatment. The pre-measured packs make treating your black tank as easy as flushing the toilet.
Share this Post
Hello,
I have a Winnebago 2020 Vita 24P Class C It has been winterized and it is new. When I dewinterize, is it normal to leave bypass on until the end, when does the water heater fill up with clean water in the process?
Chuck
Chuck, you should drain all the antifreeze and flush some fresh water before opening the bypass. That way you don’t get any antifreeze in the water heater.
Thanks,
Jason