RV Water Hookup – Read this first
Before you take your first trip to the campground you need to understand how your RV’s water system works and what equipment you need to keep you save and avoid damaging your camper.
So let’s get started.
What’s the difference between the City Water and Fresh Water Fill Ports?
- City Water – Water from the hose is forced from the city water port directly to your fixtures using the pressure from the hose.
- Fresh Water Fill – This port fills your fresh water tank and then a pump in your RV pushes water from the tank to your fixtures.
How They Work
Your hose will screw on to the city water port, but the fresh water fill (aka. gravity fill port) will usually be a larger opening that the hose just slides into. That way you can also use jugs of water to fill your tank if a hose isn’t nearby.
Some RV’s use the same port for both functions, but a selector valve is used to determine how the port works. If your RV has a valve like mine does make sure to put in the correct position.
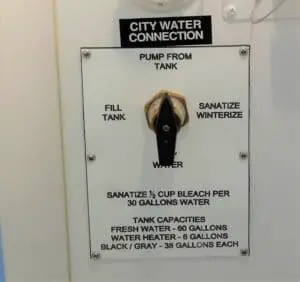
Older versions of this valve had problems with changing positions while pressurized, if your camper is over 5 years old just open a faucet to relieve any pressure before changing positions.
When do you use City Water?
You should use the city water connection any time you have a pressurized fresh water source. If you are at home, or a campground with water hookups using your city water port make life easier. You don’t have to worry about filling your tank when you run out, and you don’t have to listen to the pump running in the middle of the night when someone uses the toilet.
How do you use your Fresh Water Tank?
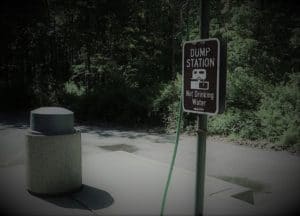
If you don’t have access to a fresh water source, then you will want to fill your tank before you get to your campsite. Most campgrounds will have a fresh water fill near the dump station. Just make sure the water says that it is safe for drinking. Many dump stations also have water that is only for cleaning and flushing your sewer hose and tanks.
Once your tank is full you just flip the switch to turn the pump on (and change the selector valve position if equipped) and you will have water. The pump has a built-in pressure switch that turns it on any time water is used.
Pump Tip: If you are leaving your camper for more than an hour or two turn the pump off before you go. That way if you have a leak it won’t’ keep pumping out.
What can go wrong when using my RV’s water system?
Like any water line your RV could develop a leak, but there are only a few things that you can do to damage the system and luckily, they are easy to avoid.
- Over pressurizing your water system
- Clogging due to debris
- Bacteria or mold growth
How to protect your RV’s water lines from over pressurization
Some campgrounds don’t have well-regulated water and the pressure can be much higher than what your piping was designed for. Installing a regulator between the spigot and your city water connection is all you need to protect your water lines from too much pressure.
How to protect from clogging
Dirt, silt and other debris can clog the screen in your RV’s water pump or in the shower and faucets. This can be avoided by using an inline water filter. Some 5th wheels and travel trailers have filters built-in. If yours has one just make sure to put a new filter in the housing each season or when your water flow starts to drop off.
If you don’t have a filter from the factory the easiest option is to use a filter that screws right on to your hose. This kind of filter is also useful for filling your water tank if you aren’t sure how clean the water is.
Another type of filter you can install is a pump strainer. They install right before your water pump. Strainers are cheap help protect the pump diaphragm in case you get debris in the water tank.
How to prevent and stop bacteria and mold
Mold and bacteria isn’t just bad for your RV, it can make you sick too. Keeping your water tank topped off is a good way to help prevent growth of nasty things.
If your RV sits in storage for an extended amount of time, especially in hot weather, you will want to sanitize the water system before using it again.
Here is an article I wrote explaining how to sanitize the water lines in your camper.
The best setup for camping with water hookups
Over the years I have developed a setup that works great for me when we have water hookups at a campground. I’ll show you all the pieces and parts here and explain what they do.
Click Here for my resource page with links to all the products I use
This list starts at the water source and ends at your RV’s city water connection
- Y-Adapter
- Drinking Water Hose
- Filter
- Pressure Regulator
- Hose Elbow
Y-Adapter
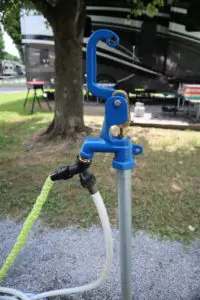
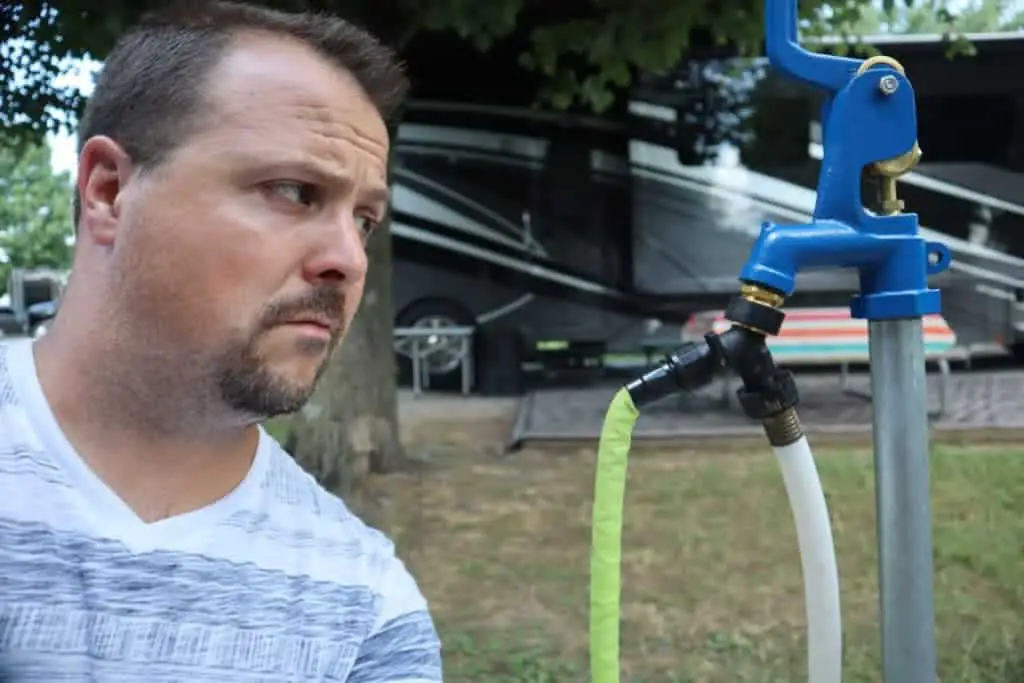
I start with a Y-Adapter connected to the spigot at the campground. This gives you a second unregulated full pressure connection for other uses like black tank flushing or connecting a sprinkler for the kids.
Water Hose
Next is a nice water hose. I like the Camco 5/8” inside diameter hose. You want a hose that is certified Lead Free and safe for drinking water. Also, you want to avoid ½” diameter hoses because they will restrict the flow. I keep two 20-foot hoses in my RV for those times when the water connection at a campsite is all the way to the front or back.
In-Line Water Filter
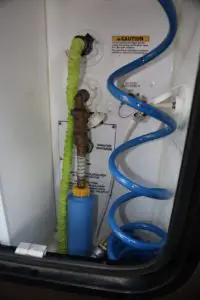
Some RV’s come have a built-in filter, if yours does you can skip this and make sure you have a clean cartridge in your filter. I like using a carbon filter since we don’t carry bottled water. We do keep a Brita Pitcher in the fridge for drinking water. I use the Camco TastePure KDF/Carbon Filter.
Pressure Regulator
A pressure regulator is a must-have. The water pressure at some campgrounds is not well regulated and may be too high for your RV’s plumbing. I like to install the regulator after my inline water filter. If you install it before the filter your will end up with a lower pressure at your camper due to the additional drop from the filter. I use a pretty basic model from Camco. There are fancier models that include a pressure gauge, but like the expensive sewer hoses I think the best value is in the middle of the road model.
Hose Elbow
The last piece of the water system puzzle is a Brass Hose Elbow. This connects to the city water port on your camper and allows the hose to hang straight down. The elbow does 2 things for you. It reduces the leverage created by hanging a hose straight out, and it lowers the chance of the hose kinking or getting damaged by someone walking by.
Expandable Hose
I also carry an expandable hose with me that I only use for spraying things down and flushing my black tank. I currently have the original pocket hose, but when it breaks I plan on moving up to the Zero-G hose. It is actually rated for drinking water, so you could replace your white water hose with it and save a little space. Just don’t use the same hose for drinking water and tank flushing. For more sewer connection tips check out this article.
Check out the Zero-G 25-foot Hose
One more tip on your water connection. I keep the Elbow, regulator and filter connected to each other. That way when I arrive at camp I just have-to connect the elbow to the city water port and the hose to the bottom of the filter. This saves a little time when arriving and breaking down camp.
A couple more tips you should know
- Always carry a water jug, I keep a blue 5-gallon jug in the front compartment of my 5th You never know when you will run out of water or have some other problem that requires you to get water from somewhere else.
- Drinking water sterilization, if you plan on camping in locations where the quality of the water is questionable, and you don’t have the option to fill your tank with safe water, installing a water purification system could be a better option than hauling bottled water around. The Acuva UV-LED Water Purification System isn’t cheap, but it will ensure that you have clean safe drinking water.
Now you can get going on the first camping trip knowing how your water system works. If you are looking for more beginners camping tips check out this article with over 100 tips to get you started.
If you join the Weekend RV Adventures Newsletter one of the first things you will get are 5 customizable checklists to help you on your adventures.
Signup Here
If you have any questions or suggestions for other readers, please leave them in the comments section below.
Thanks for Reading and Happy Camping,
Jason

How does the Acuva UV water purification system hold up in a travel trailer being bounced around the country, do the bulbs fail constantly?
Landshrk,
I haven’t used the Acuva system myself, but I know someone who installed it on their travel trailer and it has been going strong for over a year.
It probably depends on how much you travel and what kinds of roads you are on.
Thanks,
Jason
Thank you ….this is exactly what I was looking for.
With all the water parts, which one goes first and so on.
Appreciate the details 🙂
Thanks, I’m glad you found it helpful.
Jason
Can I hook two hoses together to have s long enough line?
Robin,
You can hook as many hoses as you would like, but you will see a drop in water pressure if it gets too long.
I would suggest getting larger diameter hoses like this Camco 5/8″ hose if you plan on connecting them together.
Thanks,
Jason
We never hook up to city water unless the campsite has sewer. It is too easy to fill the grey tank if you are not monitoring your water usage. We have found practicing sensible showering and dish washing techniques anytime you are camping makes a more enjoyable trip. We wash dishes is dishpans and pour in the fire pit to keep the food particles from getting in the grey tank. The two of us can go seven days on a 40 gallon fresh water tank and take a shower every day.
Jerry, That is a good point. With 2 kids we don’t have the same discipline you do to, lol.
Jason
I have a lot on the ocean that I park my camper for the summer months. I have power and sewer connections but I do not have a water connection. I’m thinking about adding a large water tank on a stand to gravity feed my camper. I’m hoping I can attach the water tank by a hose to the city water fill. Have you ever heard of anyone doing this? Any tips?